W PAINT TIPS AND TRICKS FROM A PRO Show-quality paint from prep to the spray gun By Angelo Van Bogart e followed the Mustang fastback featured elsewhere in this issue to Townsend Auto Body in Waupaca, Wis., where it was sprayed a metallic maroon base coat/clear coat, and we picked up some paint tips and tricks from pro-Mark Townsend. Townsend’s shop boasts a modern spray booth for professional-quality paint jobs, and the pointers he shared revolved around the equipment and products he used in the Mustang project. Even if you don’t have all the professional equipment of a full-time body shop, there are plenty of things to learn from this master of his craft, so let’s dig in.
Pre-paint prep
When the Mustang arrived at Townsend Auto Body, the metalwork had been completed, which included replacing and fitting metal all the way to the final pre-paint finishing. As it arrived, the Mustang’s floors had already been painted and only the outer body, which was about to receive color, needed final sanding before paint.
The body’s three coats of primer had been blocking sanded with 320-grit paper using a board file. Each time he sanded, Townsend shifted the direction of his passes with the sandpaper, but always kept the direction at an angle there were no completely vertical or horizontal movements with the sandpaper. This and the following steps removed any orange peel in the primer.
A dual-action sander (DA) can be used on larger, flat areas
Compressed air was then blown across the body to release loose sanding dust. Areas along the edge of the tape and cracks in the body were given particular care to remove dust that could be disturbed and land in the paint while it’s being sprayed. Since the Mustang was delivered to the paint shop on a rotisserie and would be painted on the same rotisserie, it was also sprayed with compressed air.
Paint booth prep
Before moving the Mustang into the paint booth, Townsend used compressed air to blow out dust from inside the spray booth (including the walls), swept the floor, and wet it to weigh down any residual dust. Filters in the air exhaust system were checked and any filters in poor condition were replaced. Any burnt-out bulbs were also replaced for maximum visibility.
Map a route and spray
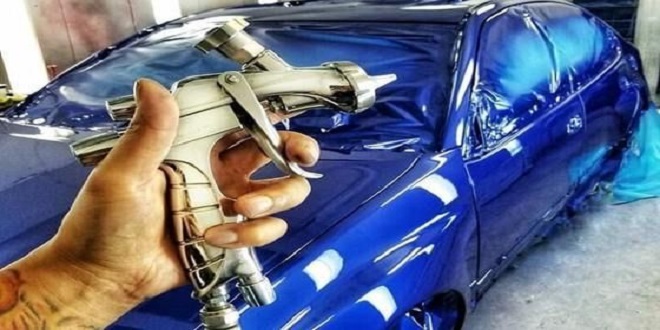
Before picking up a spray gun, Townsend recommends painters choose a path that works best with their airflow. He works from the back of his spray booth to the front, starting at the farthest point from the exhaust of the booth’s ventilation system. This pulls the paint from the gun, across the body, and to unpainted areas, then out of the booth. Spraying the opposite direction would leave an overspray on freshly painted areas and result in dry-looking or mottled sections in the paint.
The base coat has a dull appearance before it is covered with clear.
After the last basecoat has been set for the recommended time, Townsend then applied three coats of high-quality overall clear coat, being sure to allow enough time between coats to avoid any runs in the finish. All told, it took slightly more than four hours to paint the car.