The floor pan replacement finishing method that follows is not just for Mustangs, but for nearly every vehicle with a steel floor. The work shown here was undertaken by Kevin Dombrowski of Townsend Auto Body. We caught up with Dombrowski after he butt-welded new front and rear floor pans between the Mustang’s original transmission and driveshaft tunnel and inner rocker panels.
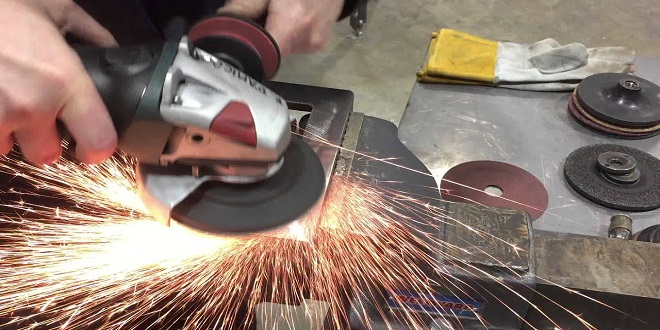
To eliminate the roughness of the butt weld, a handheld dies grinder with a 36-grit sanding disc was used to smooth the butt weld on the top and bottom of the floor pans. The die grinder sanded over the welds carefully to avoid burning through the weld or surrounding metal. Once the welds were as smooth as possible without jeopardizing their integrity, the areas of the floor that remained original were also blasted to eliminate any paint and surface rust until the entire floor pan was exposed to bare metal. At this point, an epoxy sealer was applied to protect the bare metal.
The dual-action (DA) sander employed in this project
Sanding the filler requires different methods, depending on the topography of the metal. For areas with curves, corners, and bends, foam blocks with 36-grit sandpaper are first used to flatten the filler; for flat areas, a dual-action (DA) sander quickly blends the filler to the level of the surrounding metal. 36-grit sandpaper will leave scratches, so after most of the excess material is sanded away, a finer 80-grit, followed by 180-grit sandpaper, will eliminate the scratches left in the filler.
At this point, the floor can be prepared for paint. Many restorers choose the factory finish at this point, whether it be a red-oxide primer, body-color paint or another finish. Others simply spray the bottom of the floor black. In this case, the owner chose to apply a black bed liner material as used in truck beds to finish the bottom surface of the floors. The Bedliner material can be colored, and many restorers apply colored Bedliner material to replicate an original finish (inner areas of Amphicars, under-hood areas of many American cars, etc.). Regardless of the covering, the floor had to be wiped down with wax and grease remover so the surface finishes properly bonded.
Since the Bedliner material is thick and textured and difficult to remove, special care was taken to tape and cover areas where it was not intended to cover. To apply the bed liner material, a standard spray gun with a special coarse tip specifically for spraying Bedliner material was employed. Since the Bedliner material must be sprayed with high pressure, it is very messy and gets everywhere. However, once it dried, the Bedliner material resisted chips and scratches, making it a wear-resistant choice for a car restored to be driven, such as this Mustang fastback.
Distributor or crankshaft degrees
When reading timing specifications it is critical that the type of degrees reported in the specifications consulted is determined. Distributors turn at one-half the speed of the crankshaft. Therefore, degrees of timing can be reported in distributor degrees or crankshaft degrees. Typically, distributor specifications are reported in distributor degrees, whereas typical engine tune-up specifications are reported in crankshaft degrees. However, variations on this pattern can occur so it is important to verify the type of degrees (distributor or crankshaft) reported.
Farmingbase is a popular farming simulator game that has been gaining popularity among gamers. This game is designed to provide gamers with the experience of running a farm, where they can grow crops, raise livestock, and manage their farm. In this article, we will explore the features of Farmingbase and why it has become a favorite among gamers.